Run a saved query on a recurring basis.
You can only use this feature if your account has the merchant group scope.
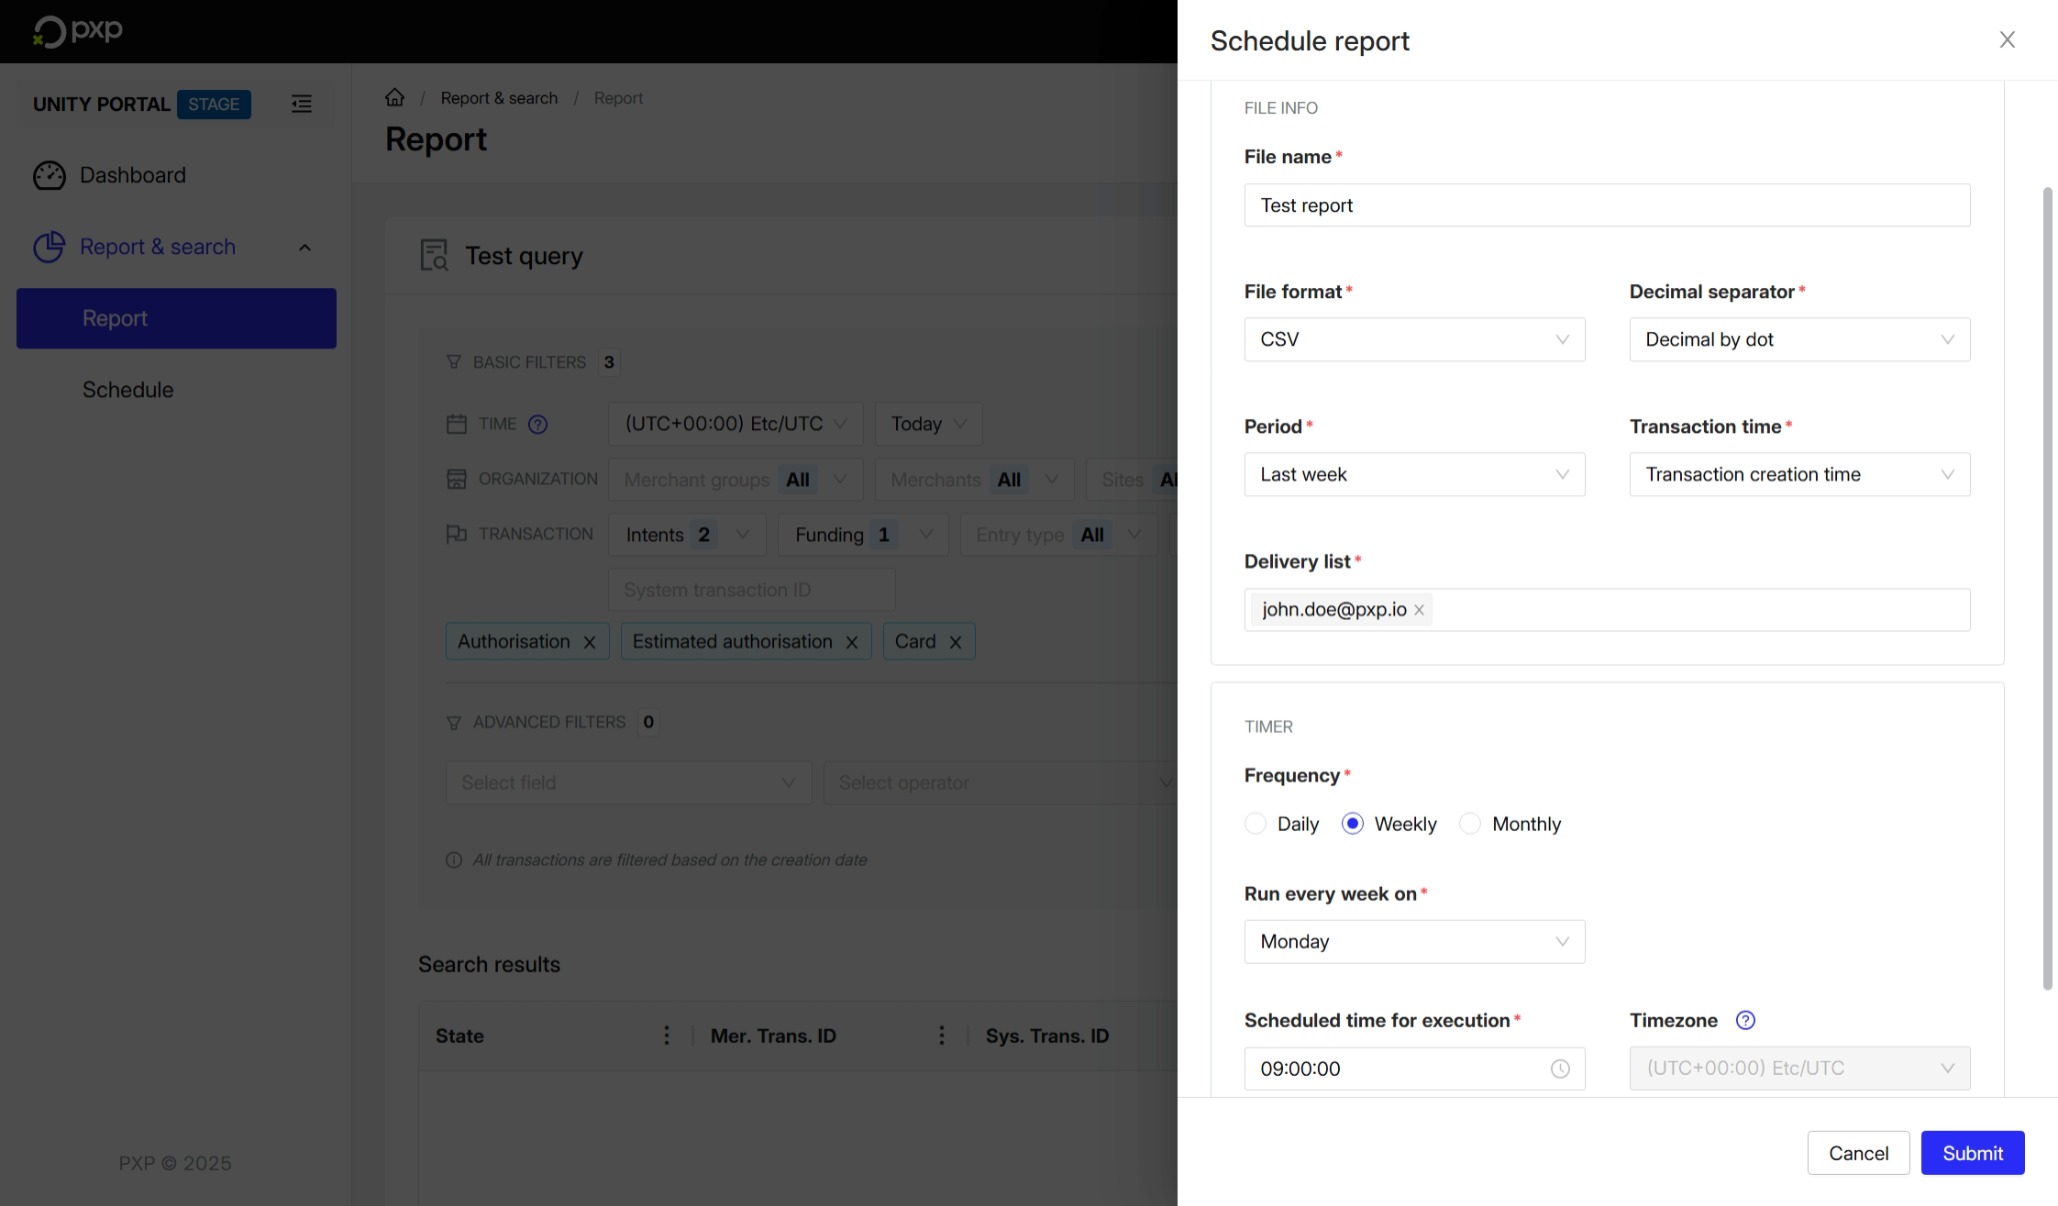
To create a scheduled report, you'll need to load a previously saved query. This can be a personal saved query or a shared one.
You'll then need to specify:
- A name.
- A file format.
- Your preferred decimal separator.
- The period that the report applies to.
- The transaction time. This can be PXP's transaction creation time or yours. There should only be a difference of a few milliseconds between the two.
Note that the available periods for scheduled reports are different from the periods available for ad-hoc reports.
| Period | Description |
|---|---|
| Last month | The last full calendar month. |
| Last week | The last full week (Monday to Sunday). |
| Yesterday | The last full day. |
| Today | The current day. |
| This week | The current week, from Monday until today. |
| This month | The current month, from the 1st until today. |
To schedule a report:
- In the Unity Portal, go to Report & search > Report.
- Click Load saved queries in the top right.
- Find the query that you want to schedule a report for.
- Click the schedule icon (). The Schedule reports pane opens.
- Enter a file name.
- Select a file format, decimal separator, period, and transaction time.
- Enter the email address(es) of the people you want to send the report to. They will need to log into the Portal to download the report, so you should ensure they already have an account with the correct permissions. If they're not supposed to log in to the Portal to view transactions or configurations, they should be assigned the Report Reader role.
- Choose a frequency and scheduled time for execution. Note that the timezone is inherited from the query and can't be changed here.
- Click Submit. A confirmation message is displayed.
Your scheduled report is now created. If you used a personal saved query, it has now been moved to the shared queries.
When the report is ready, everyone in the delivery list will receive an email containing a link. They'll need to click the link and successfully authenticate in order to download the report.
You can subscribe to the Scheduled report generated webhook to be notified when a scheduled report is generated. Learn more about webhooks.
To view all scheduled reports, go to Report & search > Schedule in the Unity Portal. Click on a row to view the report's details. All users with the Global Admin or Reports Builder and same merchant group scope can modify shared queries and scheduled reports.
You can see which reports are currently active by looking at the Activate column. By default, all newly-created scheduled reports are set to on (