Set up your Google Pay business profile and integration settings.
If you haven't already, make sure that you have activated the Components and Google Pay services in the Unity Portal. For more information, see Activate Components.
- Go to the Google Pay Business Console.
- Sign in with your Google account or create a new one.
- Click Get started to create your business profile.
- Enter your business information:
- Legal business name.
- Business address.
- Business type.
- Website URL.
- Review and accept the Google Pay API Terms of Service.
- Click Submit to create your profile.
Your Google Pay Business Profile is now created and pending approval.
- In the Google Pay Business Console, go to Google Pay API.
- Click Web integration and accept the terms and conditions.
- Enter your website URL.
- Select the Gateway integration type.
- Upload screenshots of your checkout flow.
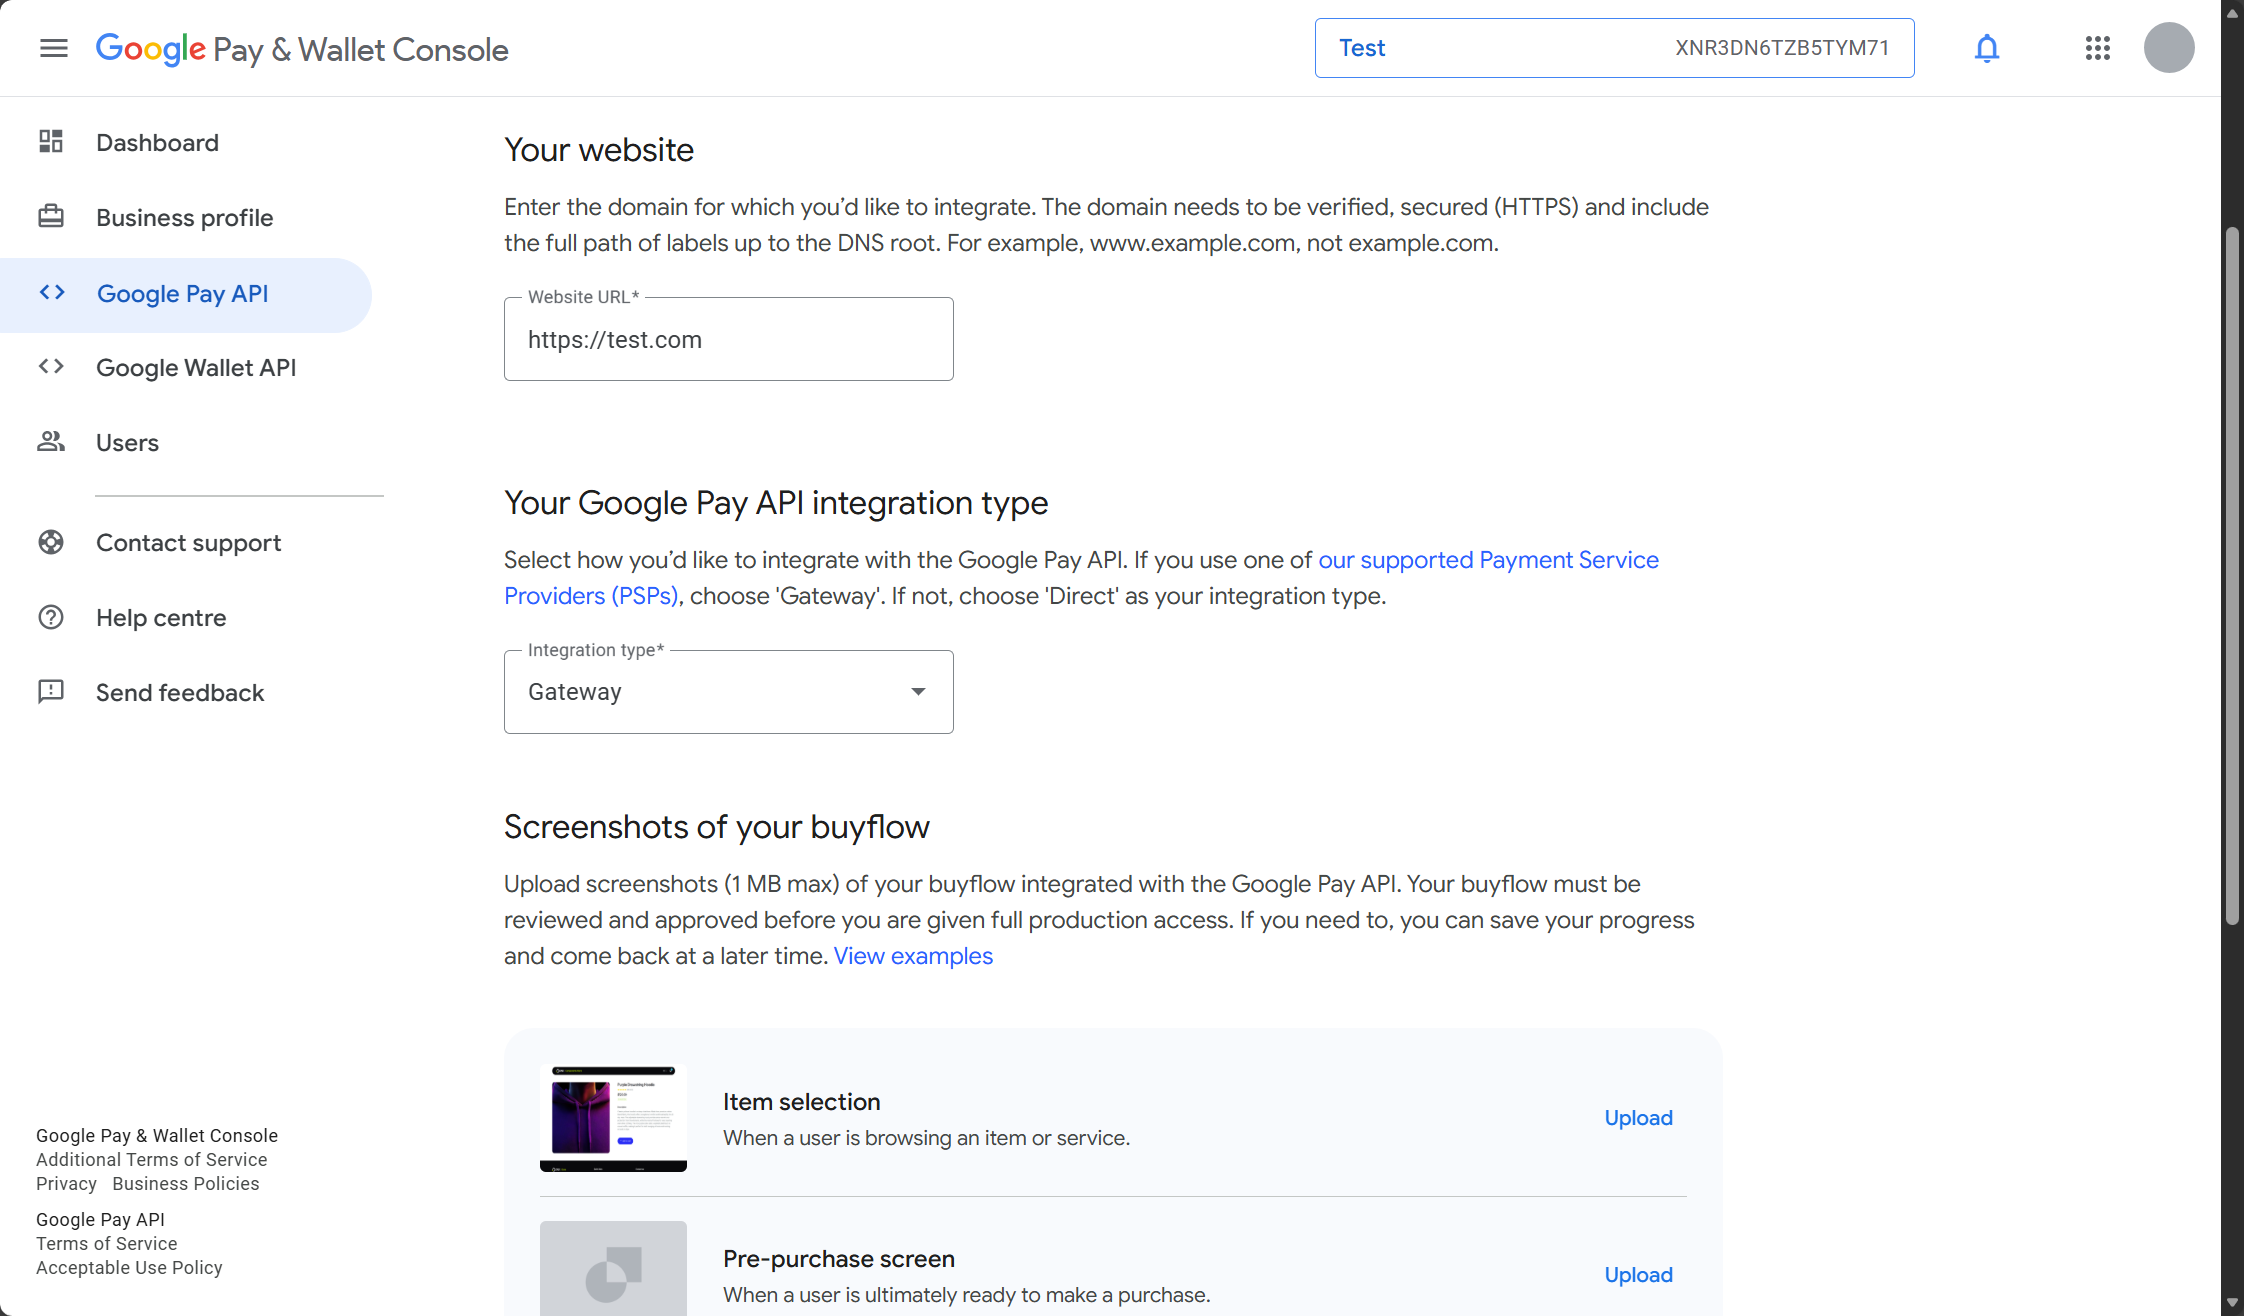
- Click Save to confirm.
If your business profile has been approved, you can click the Submit for approval button. If your business profile hasn't been approved yet, you'll need to wait until it is.
Once your web integration is approved, you're ready to register your Google ID in the Unity Portal.
- In the Unity Portal, go to Merchant setup > Merchant groups.
- Select a merchant group.
- In the Services tab, click Edit next to Google Pay service.
- Click Register account.
- Enter your Google merchant ID and click Register ID.
Your Google Pay setup with PXP is complete.