Set up your PayPal, Google Pay, or Apple Pay merchant accounts in the Unity Portal.
If you haven't already, make sure that you have activated the Links service and any relevant payment method services in the Unity Portal. For more information, see our Activation guide.
Connect your PayPal Business account to your site so you can accept PayPal payments.
- In the Unity Portal, go to Merchant setup > Sites.
- Select a site.
- In the Services tab, find the PayPal service and click Edit.
- Click PayPal account.
- Click Connect PayPal account. A PayPal pop-up opens.
- Enter your credentials, then click Next.
- Click Agree and Continue. A confirmation message is displayed.
- Click Return to PXP to go back to the Unity Portal.
If your connection is successful, a success message is displayed and your connection details are visible. You're now ready to accept PayPal payments.
If your connection is unsuccessful, a warning is displayed. See the troubleshooting section below for more information.
If there are any issues with the connection to your PayPal account, then a warning is displayed at the top of the screen.
This error indicates that you haven't confirmed your primary email address on the PayPal website. To fix it, go to your PayPal settings.
Once you've confirmed your email address, refresh the Unity Portal to view your updated onboarding status.
This error indicates that there are limitations place on your PayPal account, which prevent you from accepting payments. This could be for a number of reasons, such as an excessive number of chargebacks or non-compliance with regulatory requirements. To fix it, reach out to the PayPal customer service or go to the PayPal website to find out more.
Connect to PXP's Apple Pay account so you can easily accept Apple Pay payments.
- In the Unity Portal, go to Merchant setup > Sites.
- Select a site.
- In the Services tab, click Edit next to Apple Pay service.
- Click Register account.
- Select Use PXP's Apple Pay Account, then click Continue.
- Click Register ID.
- Click Domain verification file and save the file locally.
- Upload the file to your domain, at the following path:
https://{your-domain}/.well-known/apple-developer-merchantid-domain-association. - Back in the Unity Portal, enter your domain name.
- Click Register domain to confirm.
Once your domain is verified, your list of domains is updated and your Apple Pay setup with PXP is complete.
links.pxp.io is natively whitelisted, so there's no additional configuration needed.
Set up your Google Pay business profile and integration settings.
- Go to the Google Pay Business Console.
- Sign in with your Google account or create a new one.
- Click Get started to create your business profile.
- Enter your business information:
- Legal business name.
- Business address.
- Business type.
- Website URL.
- Review and accept the Google Pay API Terms of Service.
- Click Submit to create your profile.
Your Google Pay Business Profile is now created.
- In the Google Pay Business Console, go to Google Pay API.
- Click Web integration and accept the terms and conditions.
- Enter your website URL.
- Select the Gateway integration type.
- Upload screenshots of your checkout flow.
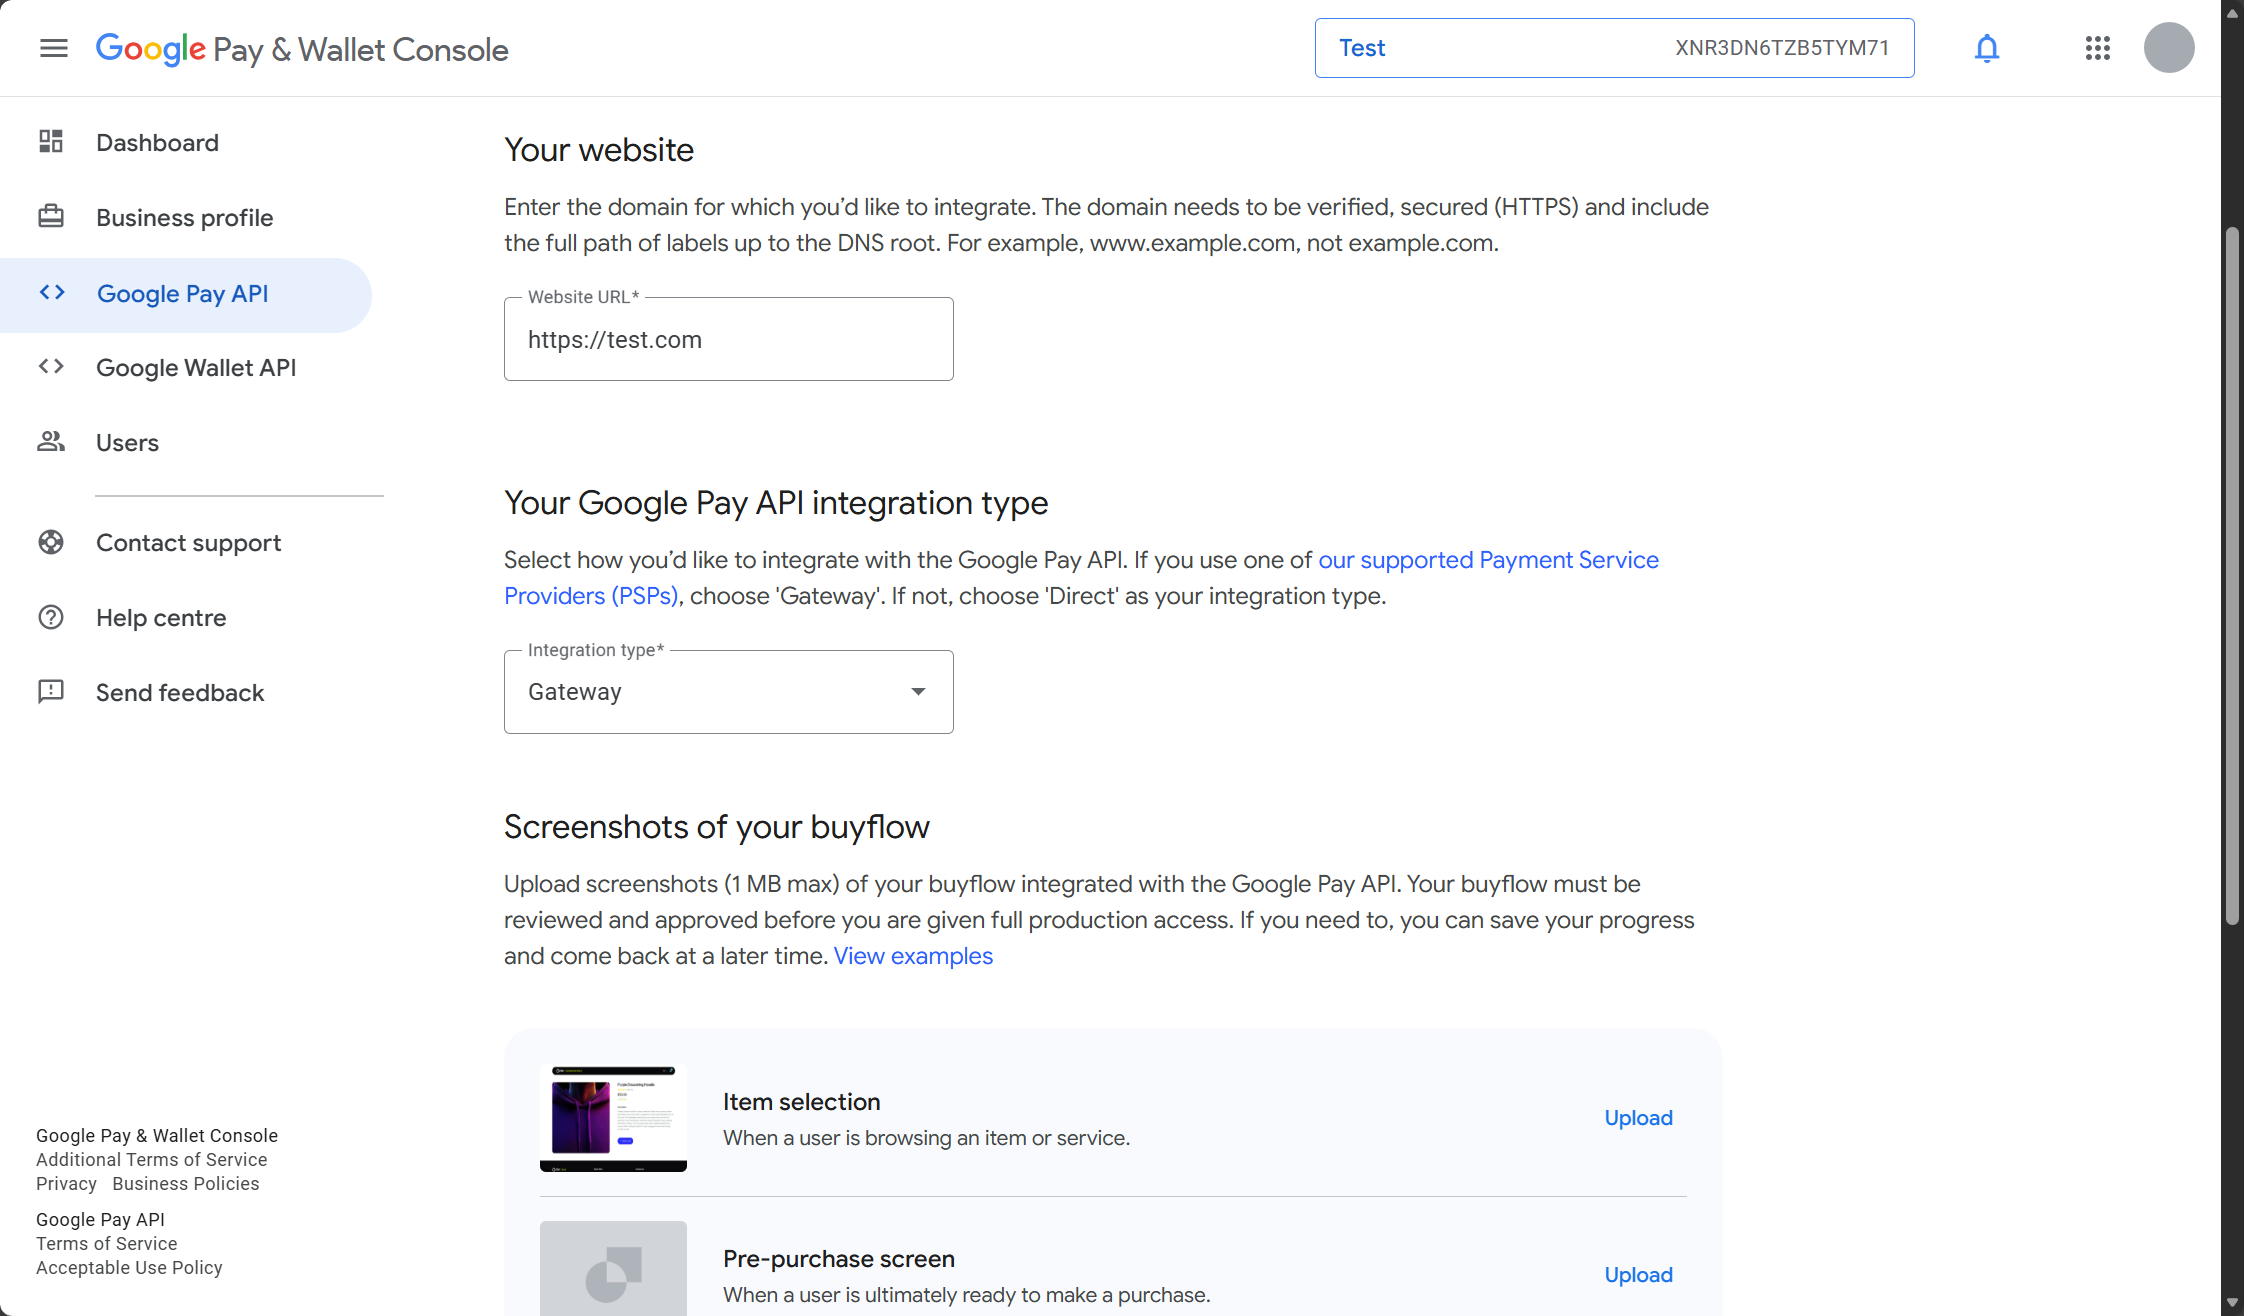
- Click Save to confirm.
When your business profile is approved, you can click the Submit for approval button.
Once your web integration is approved, you're ready to register your Google ID in the Unity Portal.
- In the Unity Portal, go to Merchant setup > Merchant groups.
- Select a merchant group.
- In the Services tab, click Edit next to Google Pay service.
- Click Register account.
- Enter your Google merchant ID and click Register ID.
Your Google Pay setup with PXP is complete.