Configure your settings for card consent, new cards, and card-on-file in the Unity Portal.
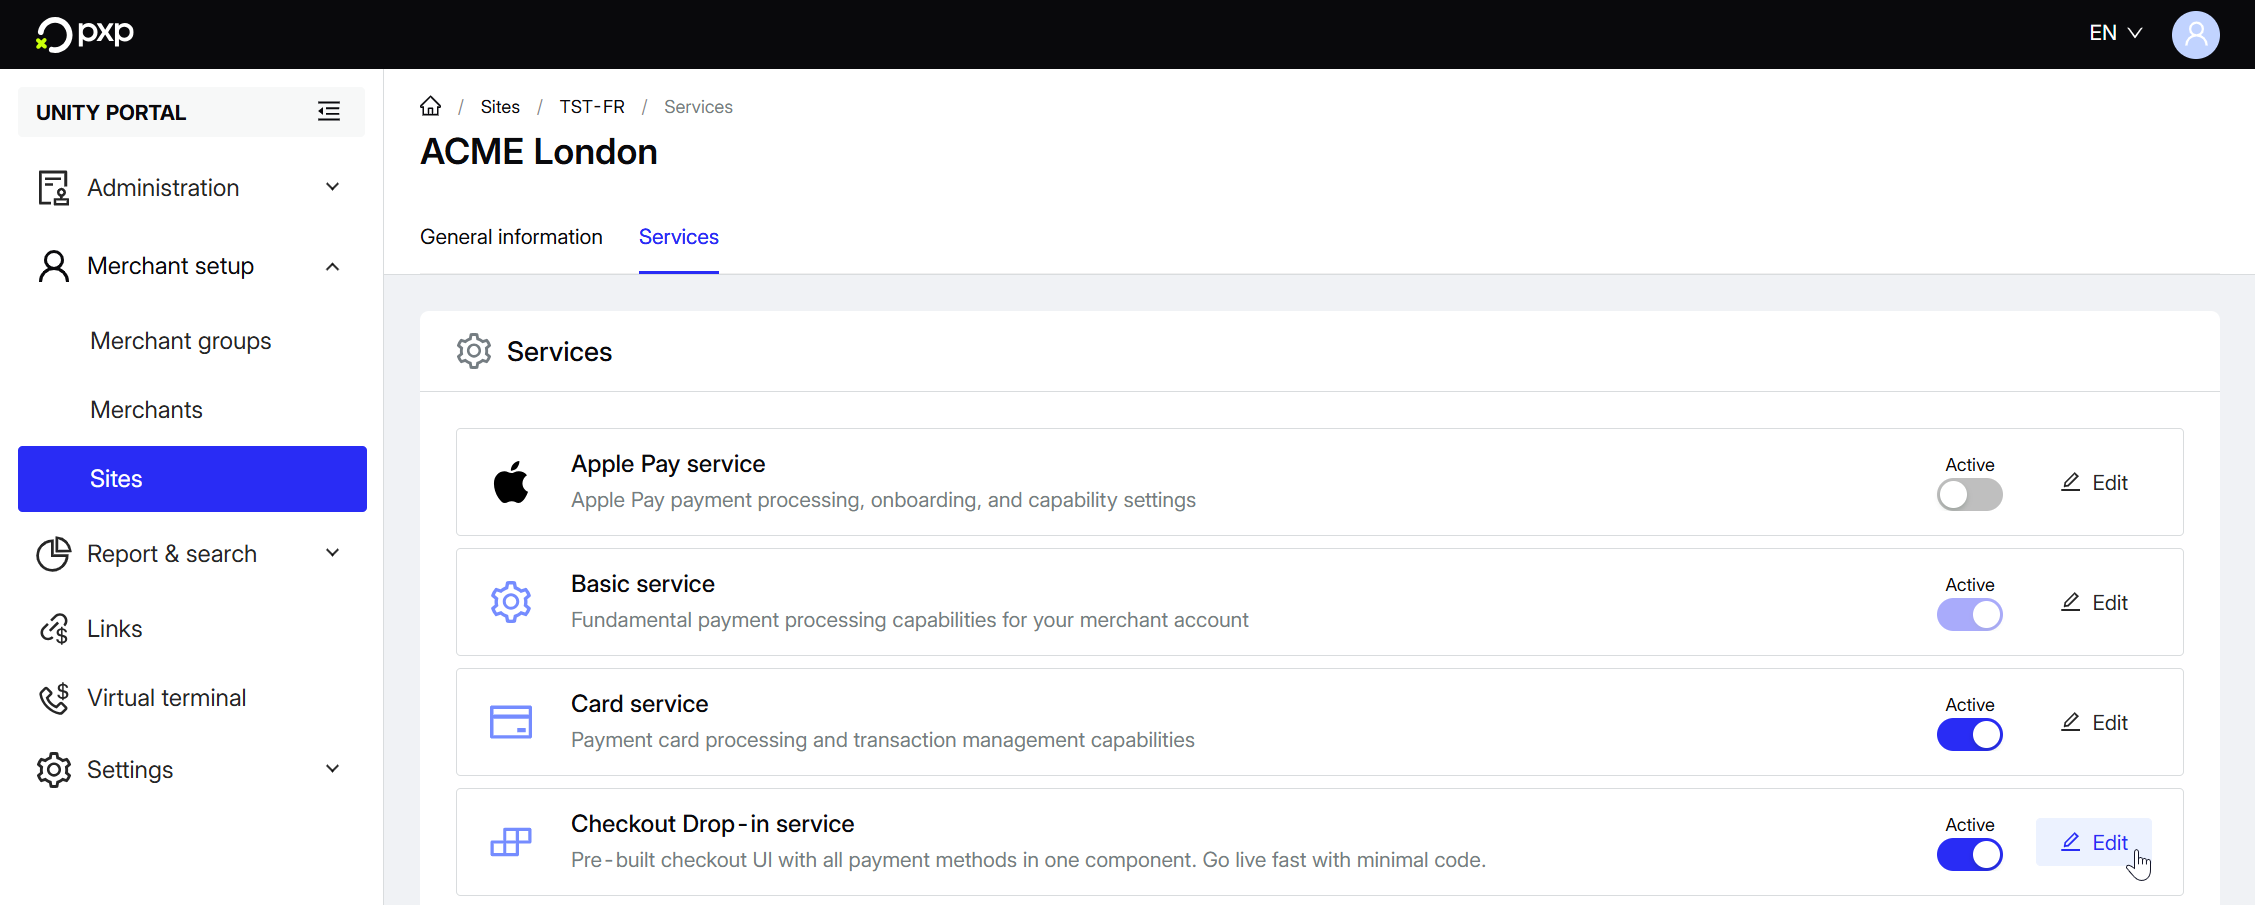
- In the Unity Portal, go to Merchant setup > Sites.
- Select a site.
- In the Services tab, click Edit next to Checkout Drop-in service.
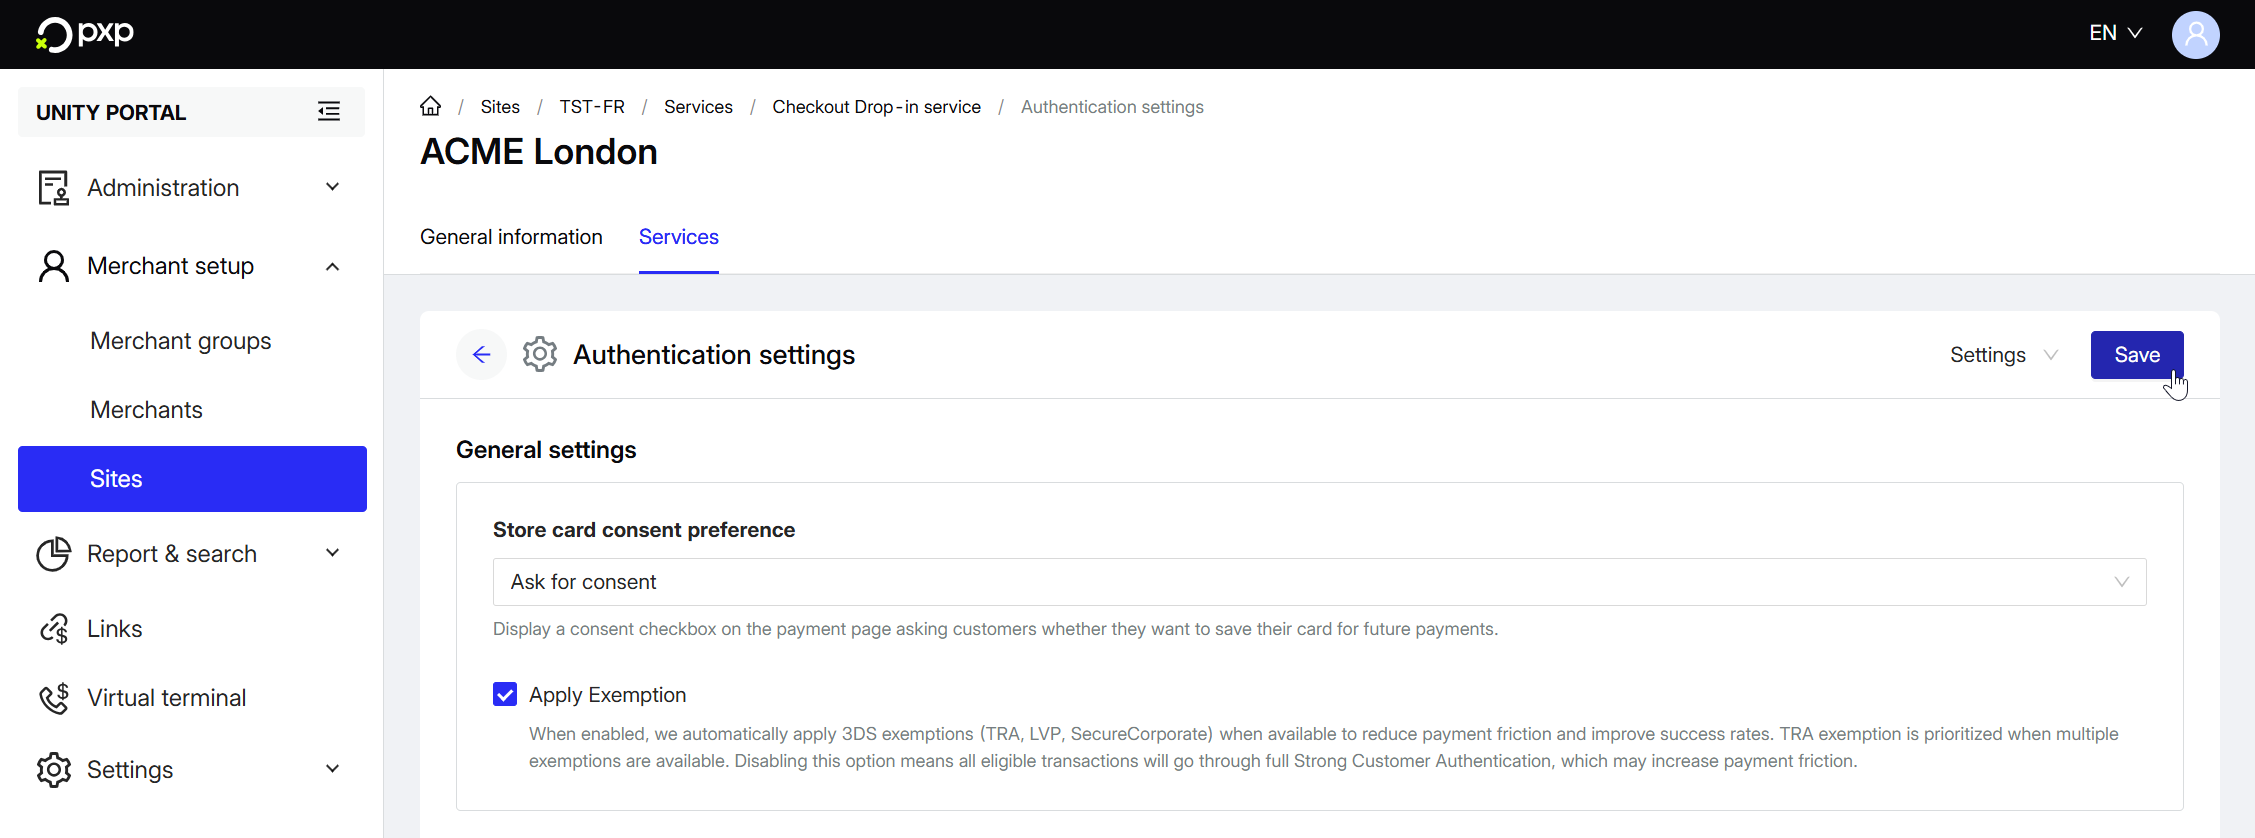
- Click Authentication settings.
- In the General settings section, select an option from the Store card consent preference drop-down:
- Ask for consent (default): Display a consent checkbox on the payment page. Customers can choose whether to save their card. This enables future card-on-file (COF) transactions and merchant-initiated transactions (MITs).
- Consent already obtained: Skip the consent request on payment page. Use this when you've already obtained consent elsewhere (e.g., during registration). Cards are automatically stored for future use.
- Don't ask for consent: Never request or store payment methods. Card-on-file components won't be rendered and merchant-initiated transactions (MITs) won't be possible. If selected, a warning about MIT and COF capabilities being disabled is displayed. Click I understand to proceed. This is the most restrictive option but ensures maximum privacy.
- Next, choose whether or not to apply 3DS exemptions:
- If you tick Apply Exemption (recommended), we'll automatically apply 3DS exemptions (TRA, LVP, SecureCorporate) when available to reduce payment friction and improve success rates. TRA exemption is prioritised when multiple exemptions are available.
- If you leave it unticked, all eligible transactions will go through full Strong Customer Authentication. This offers higher security, but may increase payment friction and lead to lower conversion rates.
- In the New card settings section, choose whether or not to require subsequent MITs. If you tick Subsequent MIT Required, initial card entry will set the challenge indicator to
challenge requestedto establish consent for future transactions. Choose this if you need recurring payments or subscriptions.
- Next, choose whether or not to enable address verification. If you tick Enable AVS (Address Verification), customers will be required to enter their billing address when using a new card.

- In the Card on file settings section, choose whether or not to require a CVC. If you tick Require CVC on Card on File, customers will be required to enter their CVC when using a stored card.

CVC entry is always required for new cards, regardless of which option you choose here.
When you're done with your changes, click Save in the top right to confirm them. They'll instantly be applied to your drop-in.