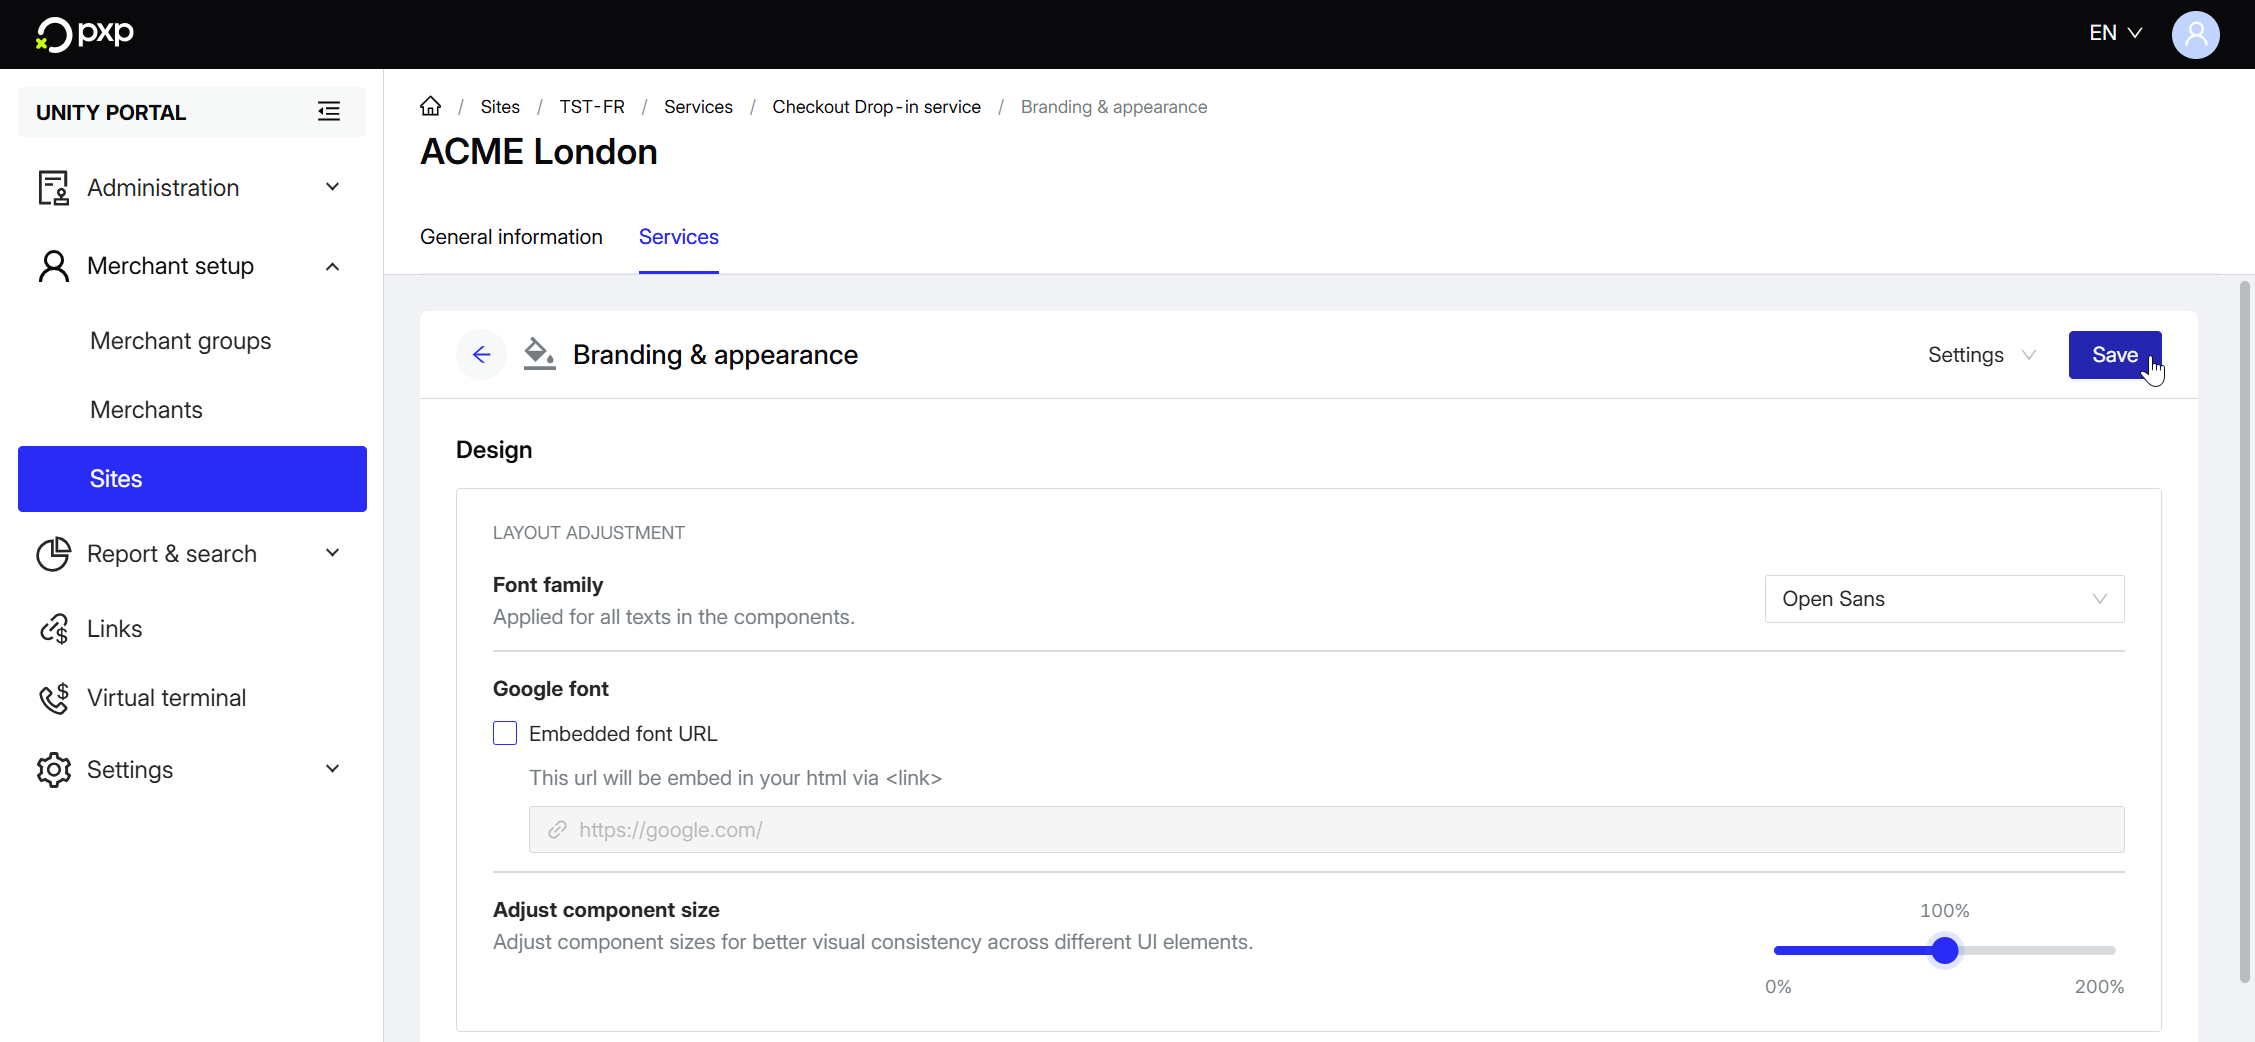
Configure your drop-in's look and feel in the Unity Portal.
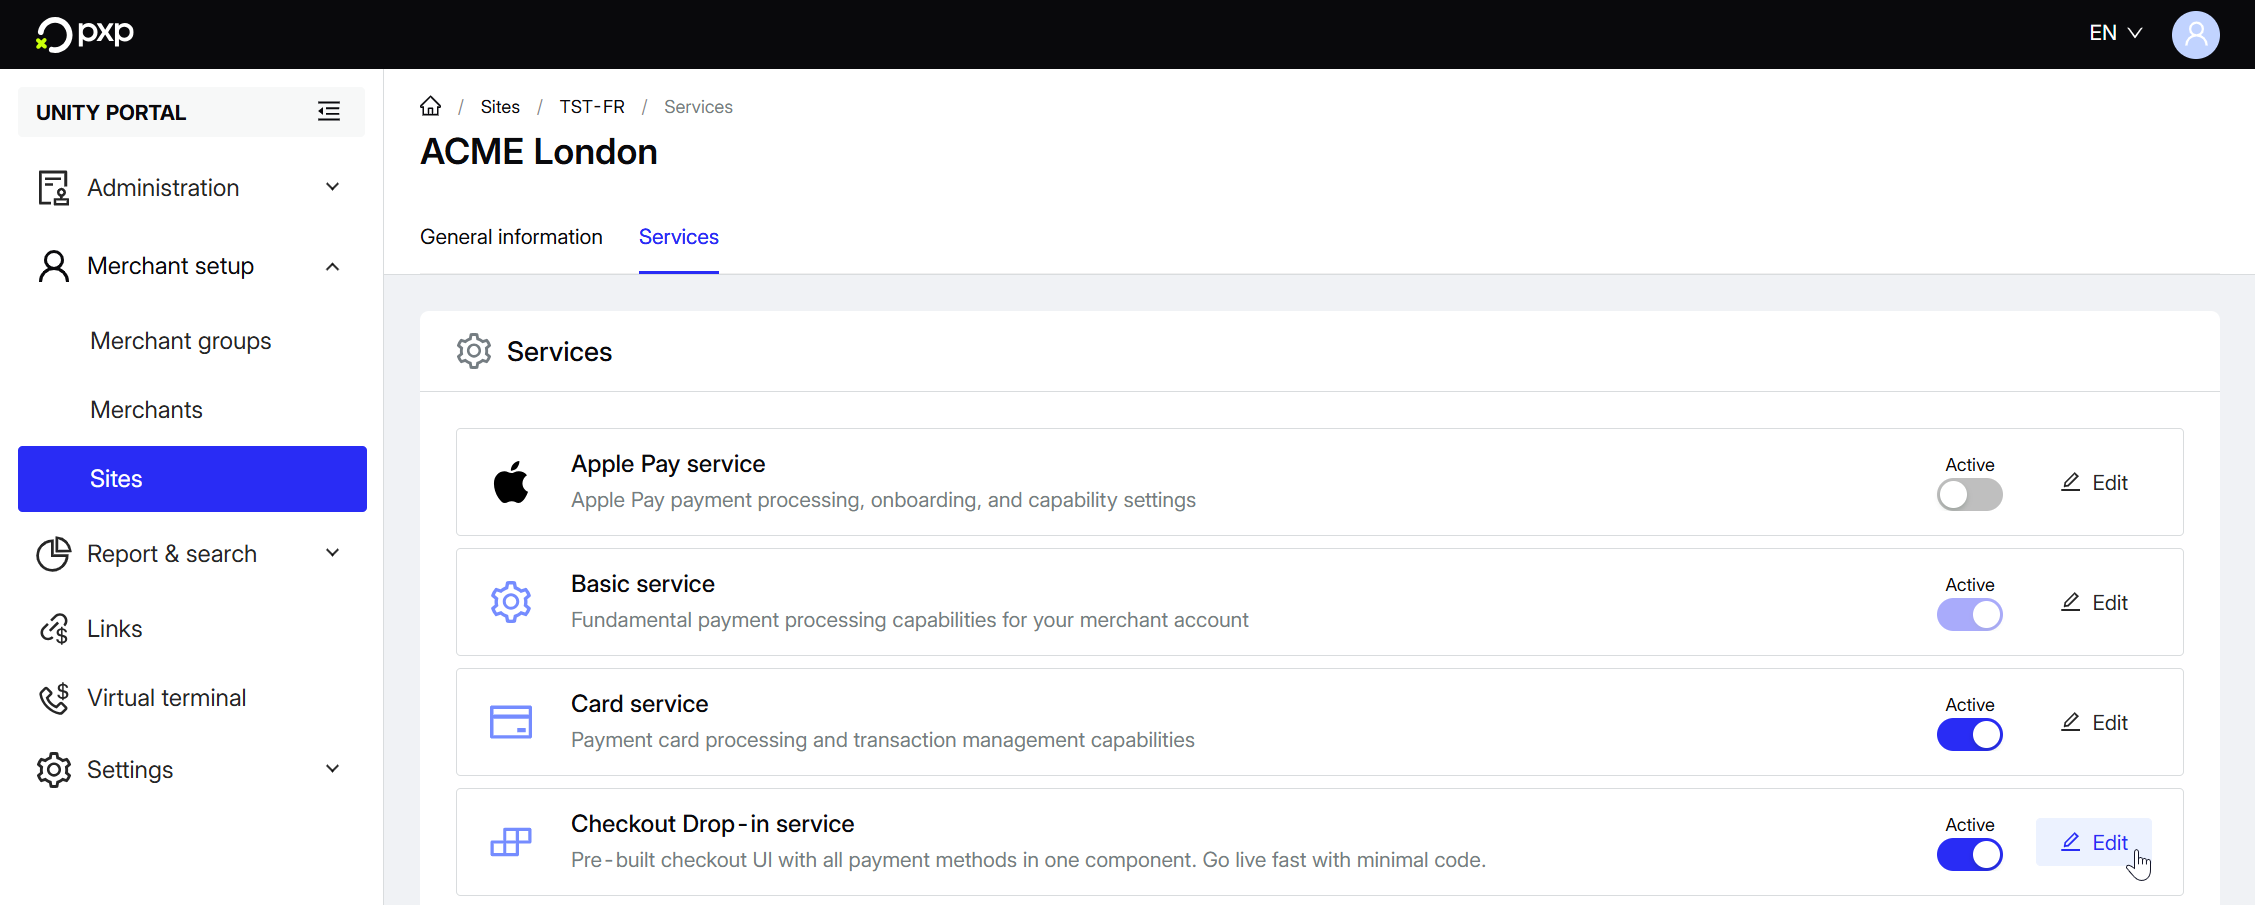
- In the Unity Portal, go to Merchant setup > Sites.
- Select a site.
- In the Services tab, click Edit next to Drop-in service.
- Click on Branding & appearance. The page opens.
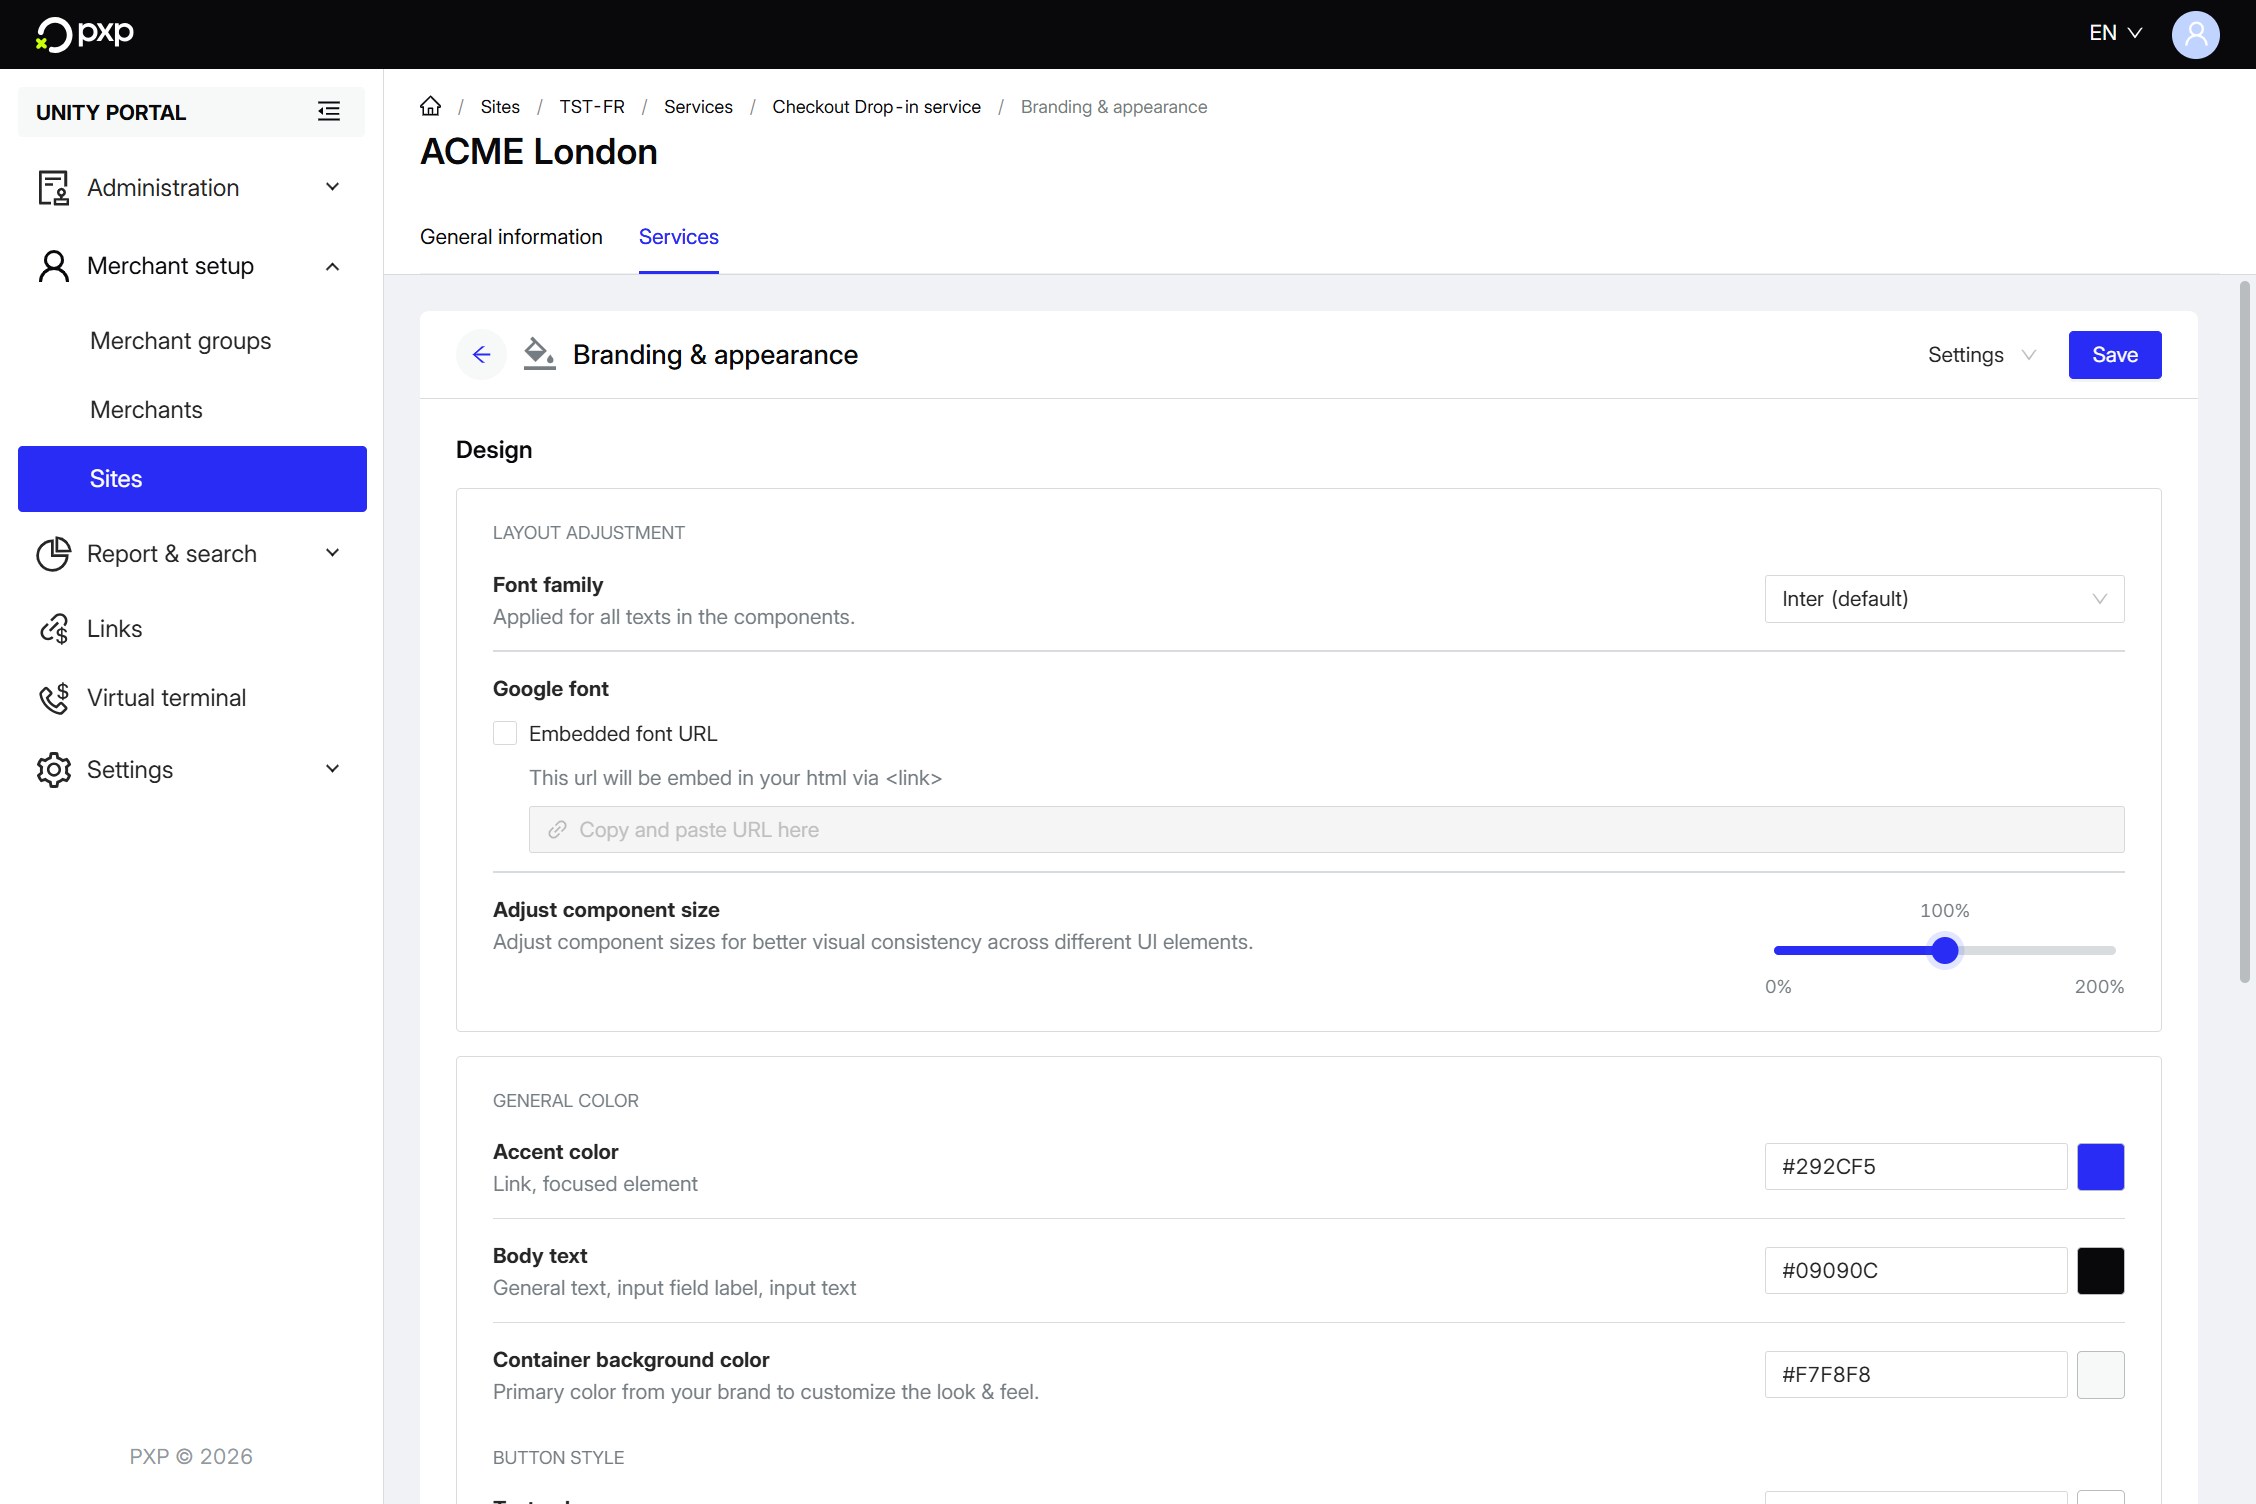
- In the Design section, go through the options under Layout adjustment:

- Font family: The font to apply to all of the text in your drop-in, chosen from a pre-defined list.
- Google font: The Google font to apply to all of the text in your drop-in, set using a direct URL.
- Adjust component size: The percentage by which to increase or decrease the size of all components. By default, this is set to 100%.
- Next, go through the options under General color and Button style:

- Accent color: The colour (hex code) to use for buttons, links, checkboxes, and focused elements.
- Body text: The colour (hex code) to use for general text, input field labels, and input text.
- Container background color: The colour (hex code) to use for the container's background.
- Text color: The colour (hex code) to use for the button text.
- Background color: The colour (hex code) to use for the button's background.
- Shape: The shape of the button. You can choose between square (default) or rounded.
To use this feature, you need to have enabled at least one payment method.
- In the Payment method ordering section, optionally select a payment method for quick selection. This means the chosen method always appears at the top of the payment selection list, regardless of your other settings. Note that only certain methods are available.

- Choose an order mode:
- Dynamic (default): Automatically order payment methods by most popular and/or customer's last used. If both options are ticked, the customer's last used payment method will be at the top of the list and additional payment methods will be ordered according to their popularity.

Dynamic ordering uses data collected over the last 90 days, with data being fetched once every hour. This means it could take up to an hour for the order of your payment methods to change. For example, if you currently have no data and make a payment with PayPal, it will take between zero and 59 minutes for PayPal to move up to the top of the list.
- Manual: Manually order payment methods by dragging and dropping them.

- Dynamic (default): Automatically order payment methods by most popular and/or customer's last used. If both options are ticked, the customer's last used payment method will be at the top of the list and additional payment methods will be ordered according to their popularity.
When you're done with your changes, click Save in the top right to confirm them. They'll instantly be applied to your drop-in.